
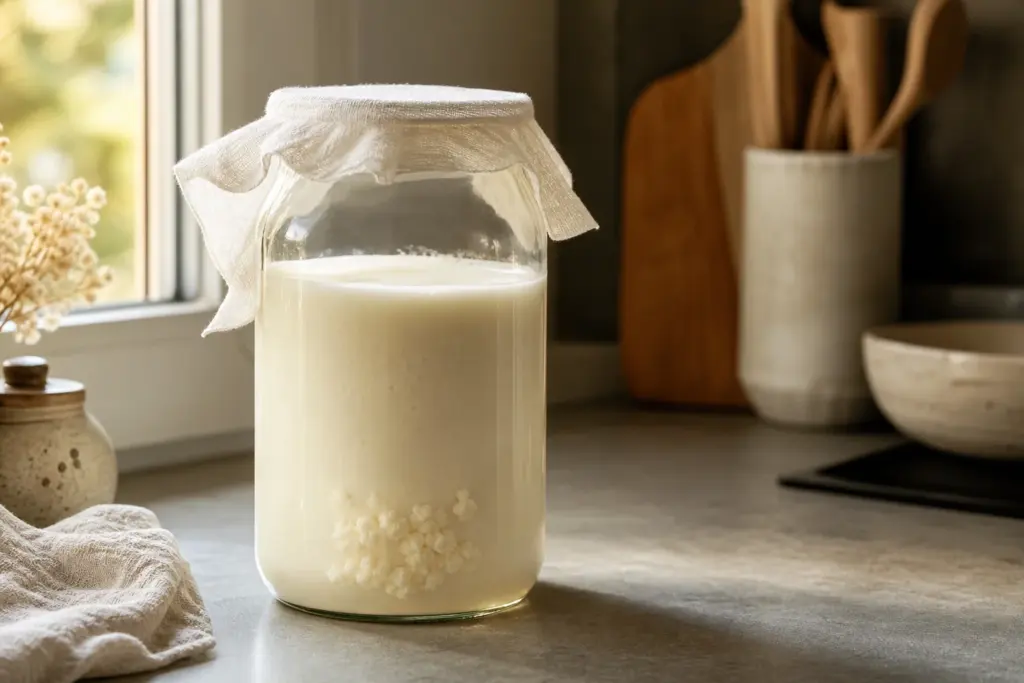
This article is for anyone curious about one of Russia’s most iconic fermented dairy drinks. By the end, you’ll understand what kefir is, where it comes from, and how to make it yourself at home in just 24 hours.
The kefir drink recipe how to make version is straightforward: combine milk with active kefir grains, let them ferment at room temperature overnight, strain out the grains, and drink. No special equipment, no heating—just patience and the right starter culture.
Quick answer: Kefir is a sour, carbonated, slightly alcoholic beverage with a consistency and taste similar to drinkable yogurt. The quickest, most reliable method is using kefir grains (a symbiotic culture of bacteria and yeast). Total time: 24 hours, mostly hands-off. Cost: low if you already have the grains; they can be reused indefinitely.
At a Glance
| Type | Drinks |
|---|---|
| Local name | Кефир |
| Origin | Kefir's place of origin is the region around Mount Elbrus in the North Caucasus. Nobel Prize winner Ilya Metchnikoff became interested in the exceptional longevity of people in the Caucasus region and concluded that soured milk, including kefir, was one of the keys to longevity and well-being. The Blandov brothers, who owned the Moscow Dairy, sought to obtain kefir grains through their employee Irina Sakharova, and the Tsar ruled that a local prince must give her ten pounds of kefir grains as compensation. The precious grains were taken to the Moscow Dairy, and the first bottles of kefir ever manufactured commercially were offered for sale in Moscow in September 1908. |
| Servings | 2–4 servings |
| Total time | 24–48 hours (mostly fermentation time; active prep 5 minutes) |
| Difficulty | Easy |
History and Story of Kefir (Кефир)
Kefir is a drink made of fermented milk whose origins lie with nomadic shepherds living on the slopes of North Caucasus Mountains. The most ancient methods involved pouring fresh milk into watertight bags made of goat or sheepskin, adding the cauliflower-like grains of kefir culture, and suspending the bag in the sun during the day. When the sun went down, the bag was brought inside and hung near the door, where each person passing in or out would push or prod the bag, helping ensure that the milk and kefir grains remained well mixed as the milk fermented. Shepherds could make their own kefir as they traveled: when leaving home, they would take skins of kefir with them, adding fresh milk from the animals they herded to replace what they consumed. As the shepherd moved, the milk would mix with the kefir grains and ferment into the mildly self-carbonated beverage. Today, kefir is the most popular fermented milk in Russia.
Ingredients
- 1 cup (240 ml) whole milk, preferably not ultra-pasteurized
- 1 teaspoon active kefir grains
- Glass jar (not metal)
- Cloth or coffee filter for covering
- Fine mesh strainer or slotted spoon
How Kefir (Кефир) Is Made
Step 1: Prepare your jar and equipment
Use a clean glass jar (never metal—it can affect the flavor and weaken the grains). Gather a fine mesh strainer or slotted spoon for later separation. Avoid ultra-pasteurized milk, which lacks the bacteria needed for fermentation.
Tip: Some Russians ferment kefir in dark jars; while not essential, keeping the jar in a dark spot respects traditional practice.
Step 2: Combine milk and kefir grains
Pour 1 cup of whole milk into the glass jar. Add 1 teaspoon of active kefir grains. The milk can be cold or room temperature. Stir gently to distribute the grains throughout the milk. Avoid prolonged contact between kefir and metal surfaces.
Tip: If you're starting with dehydrated grains, they will activate over a few batches; discard the first batch or two if the smell is unpleasant—this is normal.
Step 3: Cover and set to ferment
Cover with 2 layers of cheesecloth or 2 or 3 coffee filters and secure with rubber band or jar ring. The covering must allow air circulation; do not seal tightly. Set in a dark place at a temperature between 65° and 85° F (18°–29° C).
Tip: Avoid places warmer than 90°F, where milk spoils faster than the grains can ferment it.
Step 4: Wait for fermentation to complete
Allow to ferment for 18–24 hours. Kefir should be slightly thickened and have an acidic aroma. The kefir is ready when the milk has thickened, but before the milk begins to separate into a watery bottom layer and a more solidified top layer. Fermentation time depends on room temperature; warmer rooms finish faster.
Tip: If the kefir separates into watery whey and thick curds, it's still drinkable—just stir it up, or strain it off if you prefer.
Step 5: Strain out the grains
Pour the fermented kefir through a fine mesh strainer to separate the grains from the liquid. A slotted spoon works well for larger grains; use a colander for very small grains. Set the kefir grains in a clean jar, and start the process over with more milk.
Tip: Don't waste the grains—they can be used immediately for the next batch or stored in milk in the refrigerator for weeks.
Step 6: Drink or refrigerate
Pour the kefir into a cup and drink immediately, or transfer to a bottle and refrigerate. Refrigerate kefir for up to 2 or 3 weeks. The kefir will continue to thicken slightly in the cold. For a second fermentation with richer flavor, add the strained kefir to fresh milk and ferment another 12–18 hours before drinking.
Variants
- Second fermentation: After straining the grains, add the finished kefir to fresh milk and let it ferment another 12–18 hours for a richer, more complex flavor.
- Flavored kefir: Add fruit (strawberries, cherries, blueberries) or honey during the second fermentation, or blend finished kefir with fruit before refrigerating.
- Alternative starter method: Use store-bought kefir with active cultures instead of grains; add 2 tablespoons to fresh milk and ferment 12–24 hours.
- Sour cream method: You can make kefir at home with milk and sour cream, which contains bactericidal lactic acid microorganisms. By adding them to pasteurized milk, you can make a drink similar to kefir.
- Okroshka: Kefir can be used in okroshka (cold soup), a less common but still traditional version of the dish.
Common Mistakes to Avoid
- Using ultra-pasteurized milk: the high-heat treatment kills most bacteria, preventing proper fermentation. Choose regular pasteurized or raw whole milk instead.
- Using metal containers or strainers: prolonged contact between kefir and metal weakens the grains and can affect flavor. Stick to glass jars and plastic, wood, or stainless steel strainers.
- Fermenting at temperatures above 90°F: the milk spoils before the grains can work their magic. A cool kitchen (65–85°F) is ideal.
- Covering too tightly or using a sealed lid: kefir needs oxygen to ferment properly. Use cloth or coffee filters that allow air to circulate.
- Discarding grains after first use: if your initial batch smells odd or looks strange, it's normal. Reuse the grains for batch two or three, and they will improve.
- Ignoring separation and whey: when the kefir separates into curds and clear liquid, many think it's spoiled. It's not—it simply means fermentation went longer. Stir it back together or strain it off; both are fine.
How to Order and Eat It
Drink kefir straight from a cup, cold from the refrigerator. It is tangy and slightly fizzy. Some drink it plain; others mix it with honey, sugar, or fresh fruit. In Russia, production often continues to a second stage: the strained kefir is added to fresh milk and left to ferment another 12–18 hours, producing a larger, richer batch and allowing flavorings like sugar or lemon to be added after the grains are removed. Kefir can also be used in cold soups, smoothies, or as a substitute for buttermilk or sour cream in cooking.
To order: Кефир, пожалуйста [Kefir, pozhaluysta]
Moscow Vibes Tips
- Kefir grains improve with use. Your first batch or two may smell odd or taste weak—this is normal. By batch three or four, the grains become active and produce consistently good kefir. Don't discard them.
- Once you have active kefir grains, they are nearly free to maintain. Store them in milk in the refrigerator between uses, and they can last for years. They are also easily shared—many Russians give away spare grains to friends.
- Fermentation time varies by room temperature. At 70°F, expect 24 hours; at warmer temperatures (closer to 85°F), fermentation finishes in 18–20 hours. In cold kitchens, it may take 36–48 hours. Taste after 18 hours and strain when it reaches your preferred tanginess.
- Kefir grains float or sink depending on their age and the stage of fermentation—both are normal. Use a slotted spoon or fine strainer to catch them; if any slip through, don't worry. They can be fished out of the finished kefir.
- Unlike yogurt, kefir does not require heating the milk. Room-temperature fermentation is traditional and works perfectly. Avoid boiling or pre-warming the milk.
Where to Find Kefir (Кефир) in Moscow
Related guides
 10 Best Places to Try Russian Food in Moscow: Classics and Canteens
Main image: AI-generated illustration. It may not show the place exactly as it looks.
 10 Best Food Markets and Food Halls in Moscow: Where to Eat Indoors
Main image: AI-generated illustration. It may not show the place exactly as it looks.
 15 Best Things to Do in Moscow with Kids: Circus, Space and Parks
Main image: AI-generated illustration. It may not show the place exactly as it looks.
 Moscow Food Tour: Russian Cuisine and Local Specialties: One-Day Route
Main image: AI-generated illustration. It may not show the place exactly as it looks.
Browse more: All Food & Drink · All Other
FAQ
What exactly are kefir grains?
Kefir grains are a symbiotic culture of bacteria and yeast (SCOBY). These grains are added to fresh milk, where they ferment over 24–48 hours, transforming the milk into kefir. They look like small, cauliflower-like clusters and can be reused indefinitely.
Can I make kefir without grains?
You can make milk kefir using store-bought kefir that contains live, active cultures. Begin by purchasing high-quality, plain kefir from the store and use this kefir as a starter to culture your first batch of homemade kefir by adding about two tablespoons to fresh milk. Allow this mixture to ferment at room temperature until it thickens and develops a tangy taste, typically within 12–24 hours.
Does kefir contain alcohol?
Kefir is slightly more carbonated than yogurt and has a small quantity of alcohol. The alcohol content is minimal, typically less than 1 percent, and comes from the yeast fermentation.
Is kefir the same as yogurt?
Milk kefir is a fermented dairy product similar in many ways to yogurt and buttermilk. Think of milk kefir as drinkable, pourable yogurt. Unlike yogurt, kefir requires no heating and relies on grain cultures rather than powder starters.
How long do kefir grains last?
When properly maintained and regularly fed with fresh milk, kefir grains can last for years and even decades. They require only refrigeration between uses or regular fermentation to stay alive. They are living cultures that regenerate and multiply with each batch.
What milk should I use?
Use whole milk or 2% milk that is pasteurized but not ultra-pasteurized. You can use goat's milk or raw cow's milk; raw cow's milk is preferred because it is so full of beneficial bacteria that really enhance the healthy benefits of kefir. Avoid ultra-pasteurized milk, which lacks enough bacteria to ferment properly.
Why does my kefir smell bad?
If your first batch smells unpleasant or strongly acidic, this is normal, especially with freshly activated or dehydrated grains. The bacteria and yeast are establishing themselves. Discard the first batch or two, and by the third or fourth batch, the smell and taste will improve significantly.
Can I store kefir for later?
Refrigerate kefir for up to 2 or 3 weeks. In the refrigerator, fermentation slows dramatically. The kefir will continue to thicken and become more sour over time, even in cold storage.
Discover More of Moscow with Our Travel Tips
Get practical Moscow travel tips, new destination guides and useful updates on attractions, opening hours and prices. Plan your visit with clear, helpful information delivered to your inbox.
Moscow Vibes is a one-person project. A coffee keeps it going
Looking for more on this? Beef Stroganoff: Authentic Russian Recipe and Cooking Method (Russia Vibes)

Take this guide with you
Get a free PDF of this guide to print or read offline: key facts, tips and a map link on a few clean pages.
Report an issue on this page
Paying for your trip: please read
Payments and bookings between Russia and many other countries are currently restricted. In practice, cards issued in the EU, the UK, the US and several other countries often cannot be used in Russia, Russian cards usually cannot be used abroad, and some booking platforms, airlines and payment providers limit or pause their services for Russia. The situation changes frequently.
We do not give legal or financial advice, and this site does not encourage anyone to break any rule that applies to them. Whatever you plan, you are responsible for following the laws and regulations that apply to you, including those of your country of residence and citizenship.
Many travelers still organise their stay without problems. It is worth asking your bank or payment provider what is currently possible, contacting hotels, tour operators and carriers directly about the payment methods they accept, and checking which services are open to customers from your country. Clarify payment, cancellation and refund terms before you commit to a booking, and keep your plans flexible.
Partner links on this site may not be available in every country, and prices, availability and rules in our guides can differ from what you see when you book.
How we research and update our guides
About this guide: AI assistance and accuracy
This guide is created with the help of AI and is based on official sources where available. Mistakes can still happen. Opening hours, prices, rules and other details are given to the best of our knowledge as of the date shown and can change without notice. It offers general recommendations only, not professional, legal or travel advice. Please confirm important details with the official source before you travel; you are responsible for your own plans and decisions.
* Affiliate link: as an Amazon Associate we earn from qualifying purchases at no extra cost to you.